
Posted Date : 24 Aug 2026
Outline
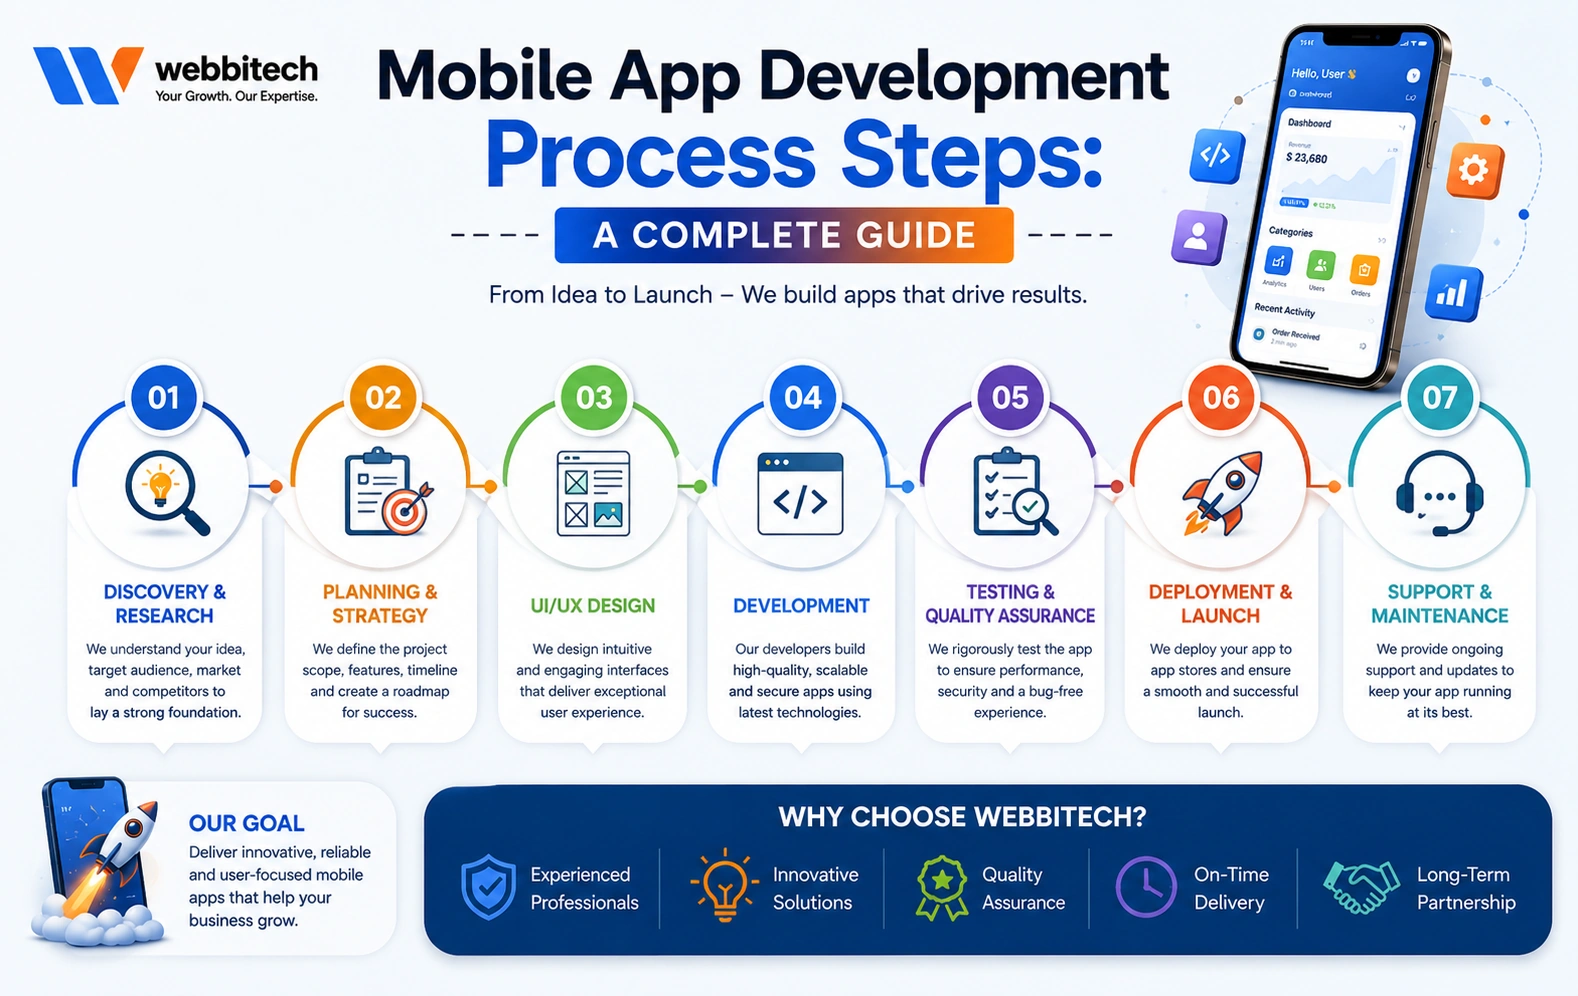
Introduction to the Mobile App Development Process
Why a Structured App Development Process Matters
Step 1: Define the App Idea
Step 2: Identify the Target Audience
Step 3: Conduct Market and Competitor Research
Step 4: Define Business Goals and Objectives
Step 5: Create a Detailed App Requirement Document
Step 6: Prioritize App Features
Step 7: Choose the Right App Development Platform
Step 8: Select the Technology Stack
Step 9: Plan the App Architecture
Step 10: Create User Flows and Information Architecture
Step 11: Design the UI/UX
Step 12: Build a Prototype
Step 13: Develop the Backend
Step 14: Develop the Mobile App
Step 15: Integrate APIs and Third-Party Services
Step 16: Implement Security Measures
Step 17: Test the Mobile Application
Step 18: Conduct User Acceptance Testing
Step 19: Optimize App Performance
Step 20: Prepare for App Store Submission
Step 21: Launch the Mobile App
Step 22: Monitor the App After Launch
Step 23: Provide Maintenance and Support
Step 24: Analyze User Feedback and App Data
Step 25: Plan Future Features and Updates
Common Mistakes in Mobile App Development
How Long Does the Mobile App Development Process Take?
How Much Does Mobile App Development Cost?
Best Practices for a Successful App Development Process
Final Checklist
A successful mobile application rarely emerges from coding alone. It is the outcome of a carefully orchestrated sequence involving research, planning, product strategy, interface design, engineering, testing, deployment, and continuous refinement.
Whether the goal is to create an e-commerce application, healthcare platform, education app, marketplace, financial product, or internal business tool, understanding the mobile app development process steps helps businesses anticipate requirements, control costs, reduce technical risk, and build a product that users can actually adopt.
A disciplined development process also prevents a common problem: discovering fundamental product flaws only after substantial money has already been spent.
Mobile applications contain many interconnected components.
The visible interface is only one layer. Behind it may be authentication systems, databases, APIs, cloud infrastructure, payment gateways, analytics, notifications, security controls, and administrative dashboards.
A structured process ensures these components evolve coherently.
It also provides checkpoints where problems can be identified before they become expensive to rectify. In software development, early correction is generally less onerous than late-stage reconstruction.
Every application begins with an idea, but an idea alone is insufficient.
The concept needs to be translated into a specific product proposition.
Ask:
What problem does the app solve?
Who experiences this problem?
Why would users choose this application?
What makes the product different?
What outcome should the app generate?
What is the core functionality?
For example, "I want to build a food delivery app" is broad.
A stronger product definition might be "A local food-ordering application that connects independent restaurants with nearby customers and provides real-time order tracking."
That distinction matters because specificity influences every subsequent decision.
An app should be designed for a particular audience rather than an abstract concept of "everyone."
Define the target users based on factors such as:
Age
Location
Occupation
Device preferences
Digital proficiency
Purchasing behaviour
Common pain points
Accessibility requirements
Understanding the audience helps shape navigation, content, onboarding, notifications, visual hierarchy, and even technical priorities.
An application intended for busy professionals may require a different interaction model from one designed for children or senior users.
Before development begins, study the existing market.
Competitor research can reveal:
Existing alternatives
Popular features
Pricing models
User complaints
UX weaknesses
Market gaps
Competitive advantages
Review competitor applications from a user's perspective.
What works exceptionally well? What feels cumbersome?
Public reviews are particularly valuable because users frequently identify shortcomings that companies overlook.
Market research can therefore transform assumptions into evidence.
The application should have measurable business objectives.
Possible objectives include:
Increasing sales
Generating leads
Improving customer retention
Automating business processes
Reducing operational costs
Increasing subscriptions
Expanding market reach
Improving customer service
Define measurable indicators such as downloads, registrations, conversion rate, retention, revenue, average order value, or monthly active users.
Without measurable objectives, it becomes difficult to determine whether the application is actually successful.
The requirements document translates the product idea into actionable specifications.
It may include:
User roles
Features
Functional requirements
Non-functional requirements
Integrations
Platform requirements
Security requirements
Performance expectations
Administrative functions
For example, a marketplace may require three separate user groups:
Customers
Sellers
Administrators
Each group requires different permissions and workflows.
A well-defined requirements document becomes a reference point throughout development.
Not every desired feature needs to be included in the first release.
Divide functionality into:
Essential for the application to work.
Important enhancements that can follow shortly after launch.
Useful additions that can be introduced later.
Long-term possibilities that should not distract from the initial release.
This prioritization often leads to an MVP, or minimum viable product.
An MVP allows a business to validate its proposition before investing heavily in secondary functionality.
The next decision is determining where the application will operate.
Android offers extensive device reach and is particularly important in markets where Android has substantial adoption.
iOS can be attractive when targeting Apple users and specific premium customer segments.
Cross-platform development allows a shared codebase to support multiple operating systems.
The appropriate choice depends on the target audience, functionality, budget, development timeline, and long-term strategy.
The technology stack consists of the programming languages, frameworks, databases, infrastructure, and development tools used to create the application.
Possible components include:
Flutter
React Native
Swift
Kotlin
Node.js
Python
PHP
Java
PostgreSQL
MySQL
MongoDB
Cloud platforms
Technology should be selected according to the product's requirements.
Choosing a framework simply because it is currently fashionable can create unnecessary constraints.
Application architecture determines how the software's components interact.
Developers consider:
Frontend
Backend
Database
APIs
Authentication
Cloud infrastructure
Third-party services
Data flow
Scalability
A strong architecture should accommodate the current product while leaving sensible pathways for future expansion.
Overengineering can waste resources. Underengineering can produce technical debt.
The objective is equilibrium.
Before designing individual screens, determine how users move through the application.
A typical e-commerce journey might look like:
Home → Category → Product → Cart → Checkout → Payment → Order Confirmation
Each transition should be logical.
Information architecture determines how content, functionality, and navigation are organized.
A confusing structure can make even a technically excellent application difficult to use.
UI represents the visual interface.
UX represents the broader user experience.
The design stage may include:
Wireframes
User flows
Visual layouts
Typography
Color systems
Icons
Components
Interactive states
Prototypes
Good mobile UX reduces cognitive friction.
Users should not need to decipher where to tap, what an icon means, or what will happen after an action.
A prototype simulates the application's interaction without requiring the complete backend.
It allows stakeholders to experience the product concept before full development.
Prototyping can expose:
Navigation problems
Missing screens
Confusing workflows
Redundant functionality
Poor information hierarchy
Fixing these problems at the prototype stage is usually far cheaper than correcting them after development.
The backend forms the computational foundation of the application.
It manages elements such as:
User accounts
Authentication
Databases
Business rules
Orders
Transactions
Notifications
APIs
Administrative controls
For example, when a customer places an order, the backend may validate the request, process payment information, create an order record, notify the seller, update inventory, and trigger a confirmation notification.
The user may see only a button.
The backend performs the orchestration.
Mobile developers then build the client-side application.
This involves converting approved designs and technical specifications into functional screens.
Development may cover:
Navigation
Forms
Authentication
Search
Profiles
Shopping carts
Dashboards
Notifications
Local storage
API communication
Development is generally performed incrementally rather than as one enormous coding exercise.
Features are implemented, tested, reviewed, and refined in cycles.
Modern applications rarely operate in isolation.
Common integrations include:
Payment gateways
Google Maps
SMS services
Email platforms
Social login
CRM systems
ERP systems
Analytics platforms
AI services
Cloud storage
Each integration requires appropriate authentication, error handling, data validation, and monitoring.
An API that works perfectly during development may behave differently under production conditions, making robust integration testing essential.
Security should be embedded throughout the development lifecycle.
Important measures may include:
Secure authentication
Encryption
Access control
Secure API communication
Input validation
Token management
Data protection
Secure storage
Vulnerability testing
Logging and monitoring
The exact requirements depend on the type of data being processed.
Financial, healthcare, and enterprise applications generally require more rigorous controls than simple informational applications.
Testing determines whether the application behaves correctly under realistic conditions.
Testing may include:
Checks whether features work as intended.
Ensures the application works across supported devices and operating systems.
Measures loading speed, responsiveness, resource usage, and stability.
Identifies potential vulnerabilities.
Evaluates whether users can navigate the application effectively.
Ensures new changes do not break existing functionality.
Testing should occur throughout development, not merely immediately before launch.
User Acceptance Testing, commonly called UAT, allows representative users or stakeholders to assess the application against real-world requirements.
Users may identify issues that technical testing does not reveal.
For example, every button may function correctly, yet users might still find the checkout process confusing.
UAT provides an important bridge between technical correctness and practical usability.
Performance influences user satisfaction, retention, and perceived quality.
Optimization may involve:
Compressing images
Reducing unnecessary network requests
Optimizing database queries
Improving API response times
Reducing application size
Managing memory efficiently
Optimizing background processes
Performance should be evaluated under realistic network conditions.
An app that performs beautifully on a high-speed development connection may behave poorly on a slower mobile network.
Before launch, the application must be prepared for distribution.
This may include:
App name
Description
App icon
Screenshots
Privacy information
Age rating
Store metadata
Developer accounts
Release configuration
The application should also be checked against the relevant store's current requirements.
A technically complete application can still encounter publishing delays if its store materials or compliance information are incomplete.
Launch day is the transition from development to real-world usage.
A controlled release can be preferable to an enormous immediate rollout.
Depending on the product, businesses may use staged deployment, beta testing, or geographically limited releases.
Monitor the application closely during the initial period.
Unexpected issues often appear only when real users interact with production infrastructure at scale.
Post-launch monitoring should examine:
Crashes
Performance
Server health
User activity
Conversion rates
Retention
Reviews
Payment failures
API errors
Analytics tools can reveal where users abandon important workflows.
For example, if thousands of users reach checkout but very few complete payment, the issue may lie in the checkout experience rather than acquisition.
Mobile applications require continuous technical stewardship.
Maintenance can include:
Bug fixes
Security patches
Operating-system compatibility
Server maintenance
API updates
Performance improvements
Database management
Third-party dependencies also evolve.
A payment API can change. A mobile operating system can introduce new requirements. A device manufacturer can alter system behaviour.
Regular maintenance keeps the application viable.
Post-launch data provides evidence about what users actually need.
Useful signals include:
User reviews
Support requests
Session behaviour
Conversion rates
Retention
Feature usage
Drop-off points
Crash reports
Do not treat every feature request as equally important.
Look for patterns.
If thousands of users encounter the same obstacle, it may warrant immediate attention.
Once the initial product has real-world data, future development becomes more informed.
Potential updates may include:
New features
Improved onboarding
Personalization
AI functionality
Better analytics
New payment options
Enhanced accessibility
Performance improvements
A product roadmap should balance innovation with stability.
Constantly adding features without improving the underlying product can create unnecessary complexity.
Several errors repeatedly create problems.
An enormous first release increases cost, complexity, and time to market.
A technically impressive product can still fail if there is insufficient demand.
Users judge an application by how easily they can accomplish their objectives.
Security problems can become expensive and reputationally damaging.
Unresolved defects can undermine adoption immediately after launch.
Technology should serve the product rather than dictate it.
Software is not a static artifact.
The timeline varies according to complexity.
| App Complexity | Approximate Timeline |
|---|---|
| Basic App | 1–3 months |
| Medium App | 3–6 months |
| Complex App | 6–12 months |
| Enterprise-Level App | 12+ months |
These are broad estimates.
The number of platforms, integrations, revisions, testing requirements, and stakeholder approvals can alter the schedule considerably.
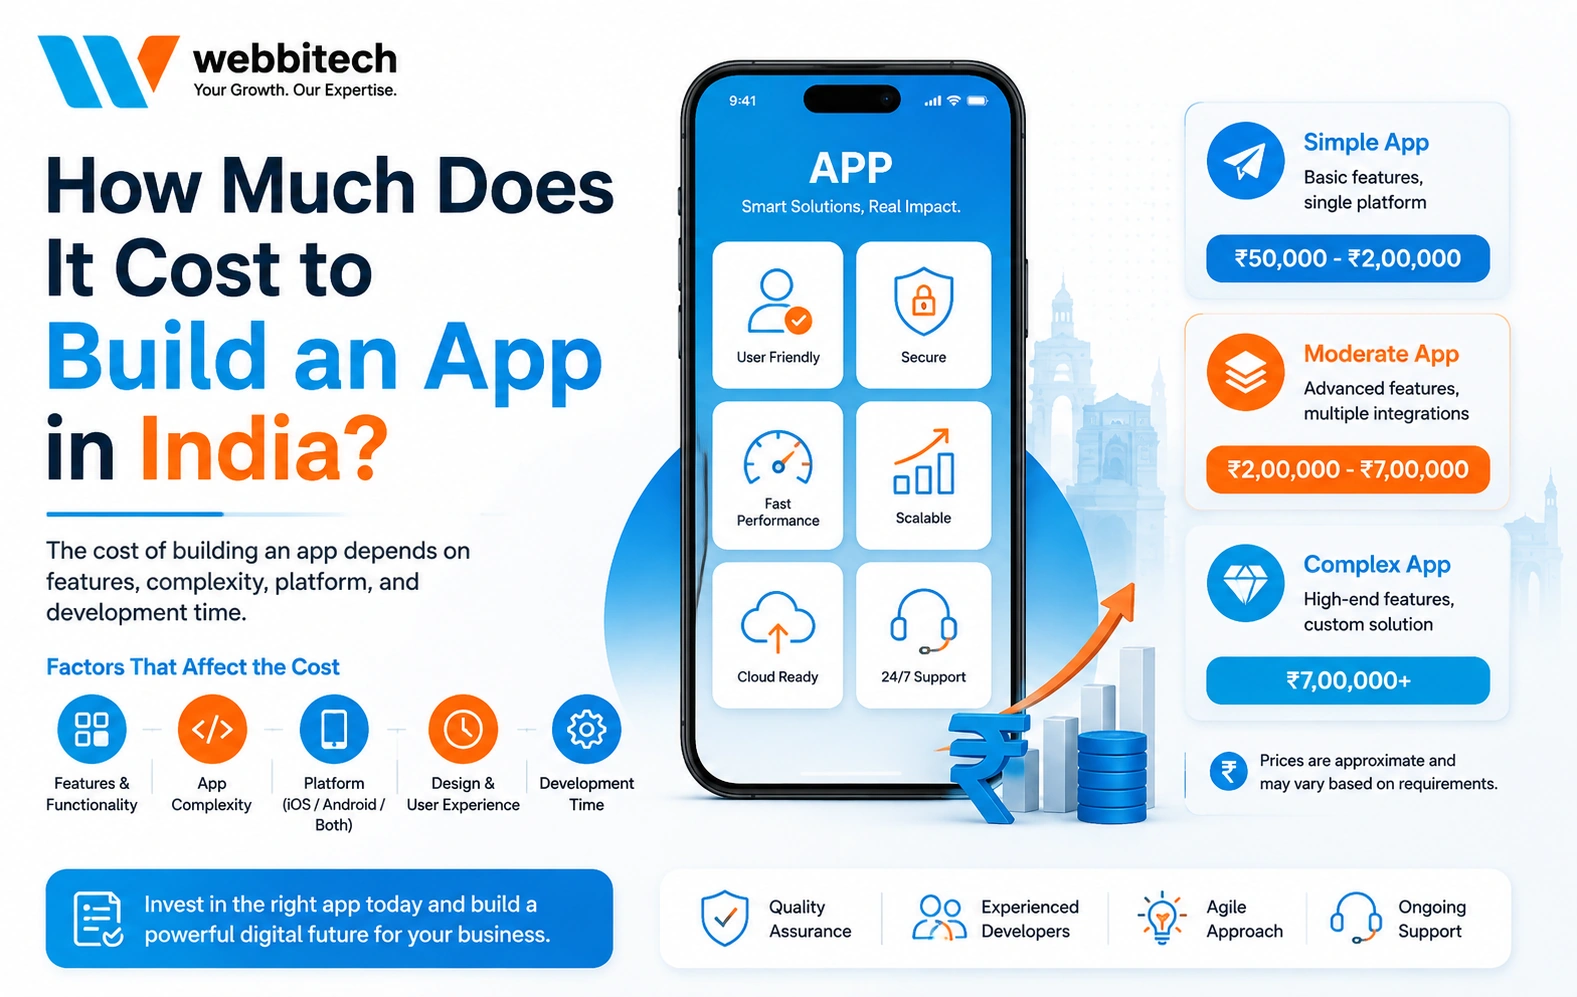
Mobile app development costs in India can vary significantly.
A basic application may cost approximately ₹1 lakh–₹5 lakh.
A medium-complexity application may range from ₹5 lakh–₹15 lakh.
An advanced application involving real-time functionality, sophisticated integrations, AI, or complex backend architecture can reach ₹15 lakh–₹50 lakh or more.
The most important cost determinants are functionality, design complexity, technology, backend requirements, integrations, testing, security, and maintenance.
A strong development lifecycle typically follows these principles:
Define the problem before defining features.
Understand the target audience.
Validate the product concept.
Prioritize essential functionality.
Create user flows before detailed UI design.
Select technology based on requirements.
Establish a scalable but pragmatic architecture.
Build security into the development lifecycle.
Test continuously.
Use real users for validation.
Monitor the application after launch.
Iterate according to evidence rather than assumptions.
This methodology creates a more resilient product and reduces avoidable expenditure.
Before launching a mobile application, confirm that:
The business objective is clearly defined
The target audience has been identified
Competitor research has been completed
Requirements are documented
Features have been prioritized
Platforms have been selected
Technology has been evaluated
App architecture has been planned
User flows have been created
UI/UX has been approved
Prototype testing has been completed
Backend development is complete
APIs and integrations are tested
Security measures are implemented
Functional testing is complete
Compatibility testing is complete
User acceptance testing is complete
Performance has been optimized
Store submission requirements are ready
Analytics and monitoring are configured
Maintenance arrangements are established
Future development priorities are documented
The mobile app development process steps extend far beyond writing code.
A successful application emerges through a continuum of research, product definition, planning, UX design, architecture, development, integration, security, testing, deployment, monitoring, and continuous improvement.
The strongest projects treat development as an iterative discipline rather than a one-time technical assignment.
Start with a clear problem. Understand the users. Build only what is necessary for the first release. Test relentlessly. Measure real-world behavior. Then improve the product using evidence.
That approach creates an application that is not merely functional but useful, maintainable, scalable, and capable of evolving with its audience.

Have a project in mind? Let’s build something amazing together.
Webbitech — A Leading Web Design & Web Development Company with 15+ Years of SEO & Digital Marketing Expertise, Delivering Countless Success Stories
From idea to execution, we help businesses create high-performing websites and applications.
Start your journey today and take your brand to the next level.


 Get Free Consulting
Get In Touch
Get Free Consulting
Get In Touch
